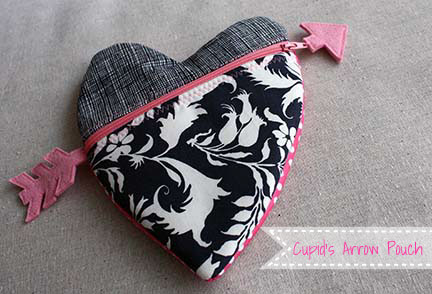
Need a easy little gift for Valentine’s Day? This perfect Cupid’s Arrow pouch is just the right size to hold a gift too! The little arrow becomes the zipper pull. Make one, or a few! (I think I made 5!)
What you’ll need to make one pouch:
Print the PDF pattern pieces from here. (Make sure that the 1″ box on the pattern actually prints at 1″ square.)
1 Fat Quarter (or 1/4 yard fabric) per pouch front
1 sheet coordinating felt
1/2 yard lightweight fusible interfacing (I used Pellon SF101, my favorite!)
1 – 12″ (or longer) coordinating polyester zipper
EDITED:
You can also use scrap fabric for the front and back, and fusible fleece instead of the Pellon SF101. Pictures are from one of the first ones I made, but everything is the same. If you use the fabric on back instead of fleece, just be sure you attach fusible fleece to the back of this piece also.
Cut out the following pieces:
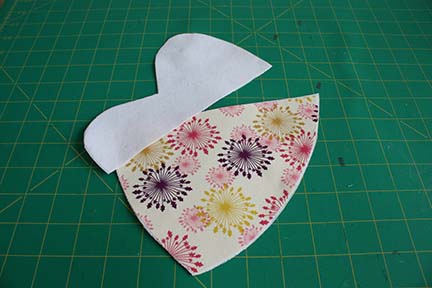
Heart Top – 1 Main Fabric, 2 Interfacing
Heart Bottom – 1 Main Fabric, 2 Interfacing
Apply Interfacing:
Following the directions on your interfacing, iron the pieces to the back of your main fabric. By adding two layers we get a good thickness, without using the super firm interfacing that’s more difficult to sew with.
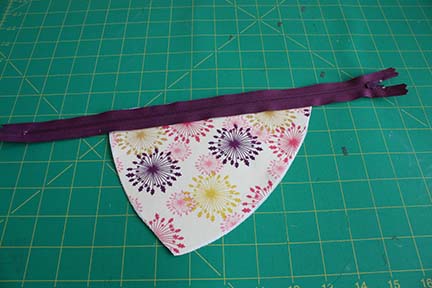
Attach the Zipper
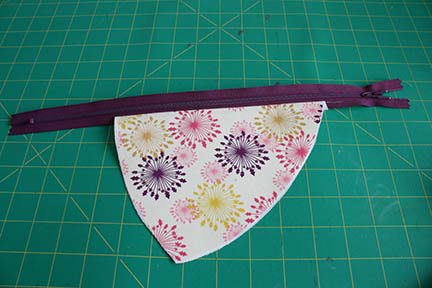
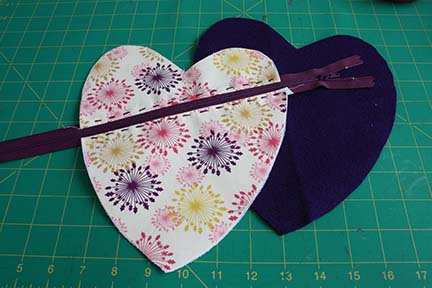
Lay the zipper, right side down, with the pull on the right, along the top edge of your bottom heart piece.
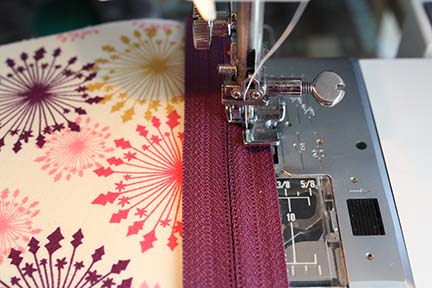
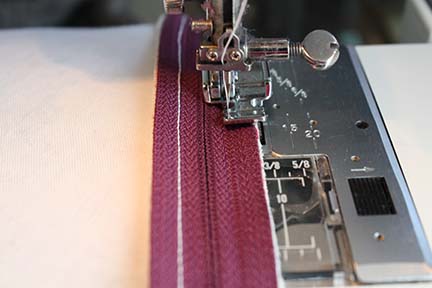
Use your zipper foot on your machine and attach the zipper to this piece.
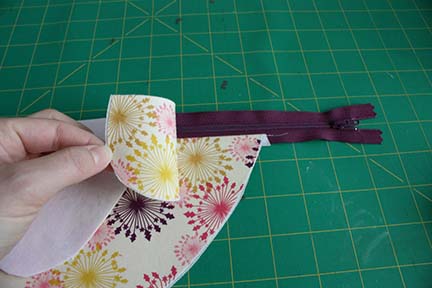
Fold the zipper up and press the seam flat.
Place the heart top face down, on the other edge of your zipper.
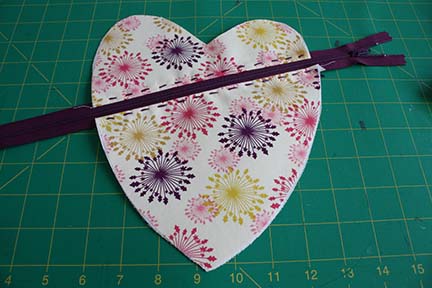
Attach this side of the zipper to your heart. Press this side up as well.
Top stitch on your machine (or do a running stitch by hand) along the top to hold this seam down.
Cut the Back
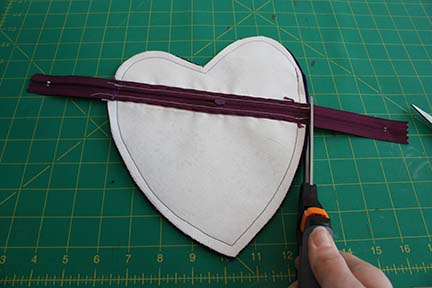
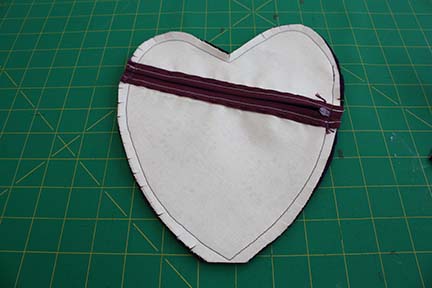
Zip the heart up and use this as a guide to cut the back felt piece.
Make the Arrow Pieces
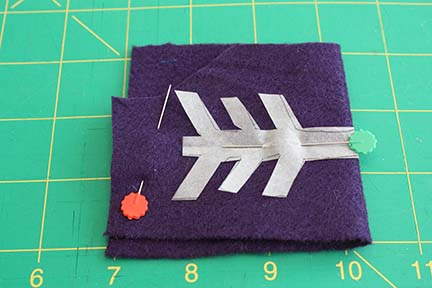
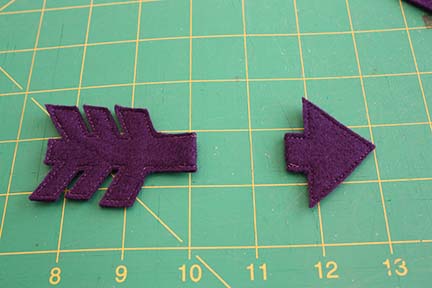
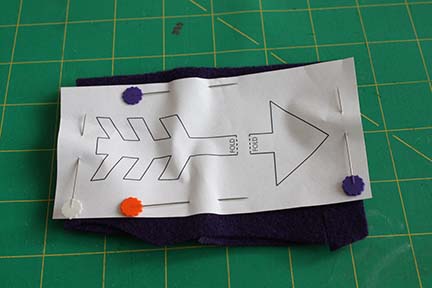
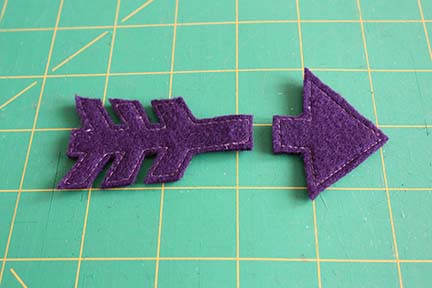
Cut out the arrow tip pattern piece. Place small edge along the fold of your felt. Pin the pattern in place.
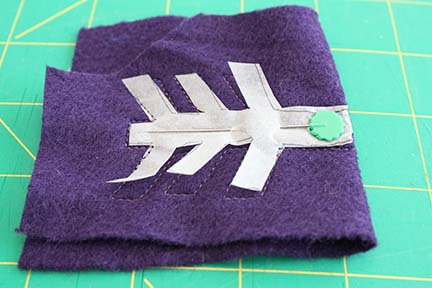
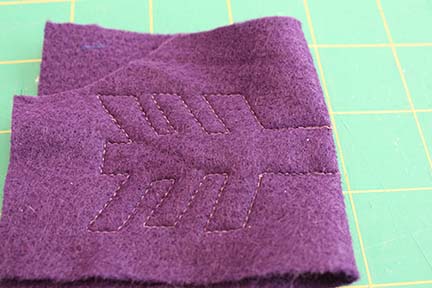
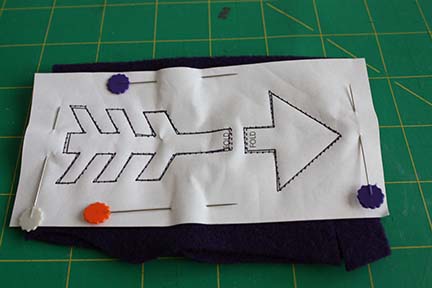
Stitch around the pattern.
After you’ve stitched it, go ahead and cut closely around your stitching line. (It’s easier to stitch this way!)
Repeat the process to make the arrow zipper pull.
EDITED:
After making this project with my after school group yesterday we found it easiest to attach the pattern to the felt,
sew directly on the lines,
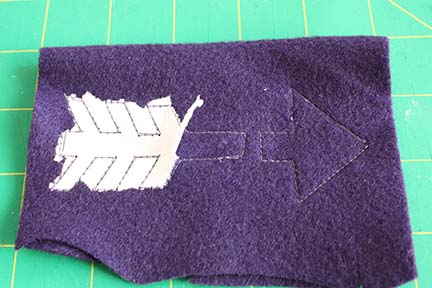
remove the paper,
then cut out your shape. (If you use this method, don’t worry about placing the pattern piece on the fold, just sew along that line instead.)
Finish Up
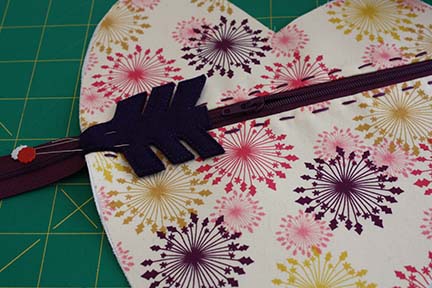
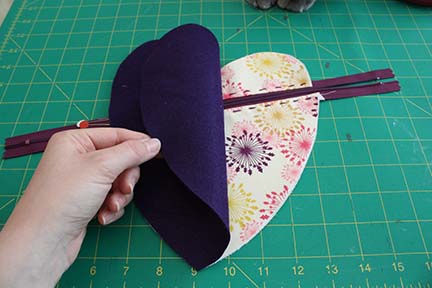
Unzip your zipper half way. (Don’t forget this step, otherwise you’ll be stuck with a pouch that’s inside out!) Place your front, right side up, on your table.
Place your arrow tip piece lined up on the edge where your zipper is on the left side of your heart. Pin.
Place your felt back on top of this.
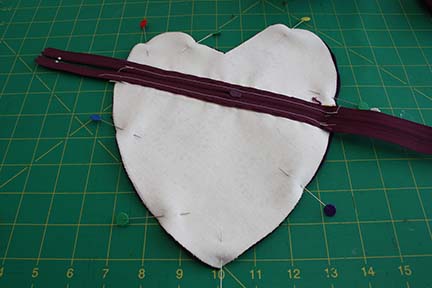
Pin.
Stitch 1/4″ all the way around the edge. Clip off the extra zipper ends. Finish your edges with pinking shears or a zig-zag stitch on your machine. (I forgot to do this on the one pictured.)
Clip the bottom excess fabric and snip around the curves. Turn right sides out through the zippered opening. Press flat.
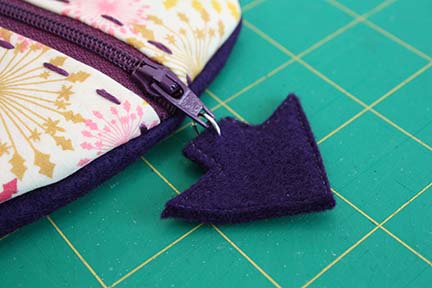
Attach your arrow tip to the zipper pull. I used a little jump ring on the one above. Needle and thread works just fine too!
Happy Sewing,

Really cute idea :))
I love this idea!!
Thank you!
too cute! i want one. no, i need a couple. just perfect perfect perfect.
looked for an email address, as wanted to invite you …
come share your fabulous creation at our linky party here http://www.finecraftguild.com/party/ our readers would love to be able to find this!
Happy to hear you enjoy using Pellon products, especially SF101 Shapeflex. Go to our website to enter our Valentine’s Day Contest! Adorable project!
Pellon Website – http://www.pellonprojects.com or Friend us at Facebook!
I love this! So cute, and you did a great job, I am terrible at sewing in a straight line!!
So cute!! I would love for you to link up to my Valentines Party @ http://www.cheapcraftymama.com!
Very cool. Great tute too!
You should join me for handmade 52 http://raisingoranges.blogspot.com/2012/02/handmade-52-5.html
I Love this! We are hosting our first Kitchen Fun and Crafty link party this Friday (the 10th) and would love for you to share this! We will open it tonight to start linking up. Feel free to stop by and grab a party button! http://kitchenfunwithmy3sons.blogspot.com/
Really cute, this is an item for my to-dolist.
I can see my young granddaughter pulling off the arrow head soon so I think I will sew it into the back of the heart at the zipper head side for the little ones. Cute project thank you for sharing it!!
Erin…you have done it again…your talents are endless and you are rousing up the crafting community…totally awesome! Pamie G.
Paragraph writing is also a fun, if you be acquainted with after that you can write or else it is difficult to
write.