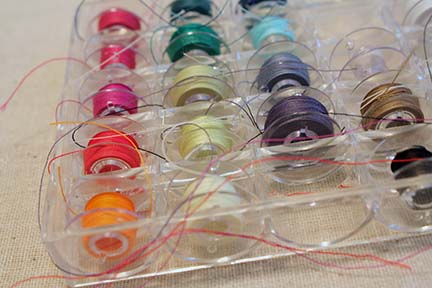
If you sew, you know that your bobbins can go from nice and organized to messy and stringy in a matter of minutes. Case in point:
Looks pretty bad huh? And I promise that I made them all nice and neat less than a week ago and didn’t make it more messy just for a picture! When you go to get one bobbin out, the others just unravel more making an even bigger disaster!
I searched online for bobbin clips to purchase. The only ones I found were for a pack of 10 for almost $10 on Amazon.They included the bobbins too, but they were for Brother machines. I sew on a Janome… Although they use very similar bobbins I didn’t want to pay $10 before shipping for it.
I knew there must be a better way. I needed something clear (so you can see your thread colors), flexible (to accommodate the different amounts of thread on each of your already wound bobbins), and cheap.
Enter my local home improvement store. Surely I could find something clear, flexible, and cheap there! I did! I present to you:
DIY Bobbin Covers
You’ll need just two things:
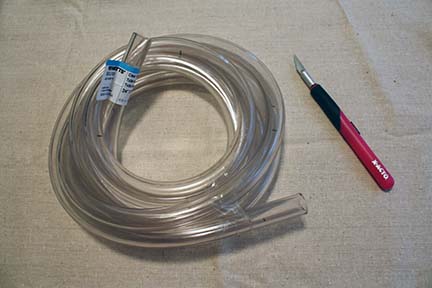
Clear Flexible Tubing (Found in the plumbing department at your local home improvement store. I got the kind that was 3/4″ on the outside with a 1/2″ diameter on the inside.)
X-Acto Blade
Ready to get going?
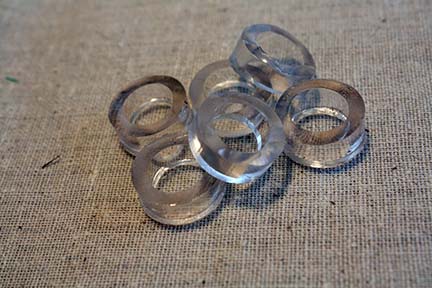
Being careful with the sharp blade, slice off some 1/4″ rings from the tubing.
Then cut down one side of each ring, opening it up.
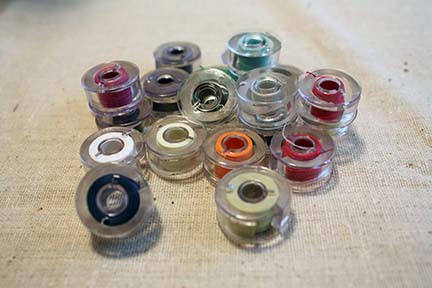
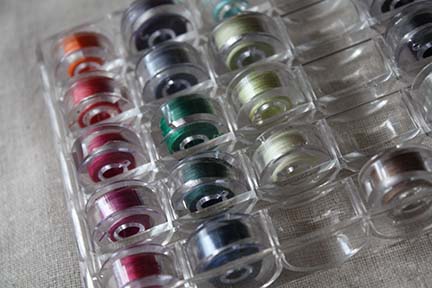
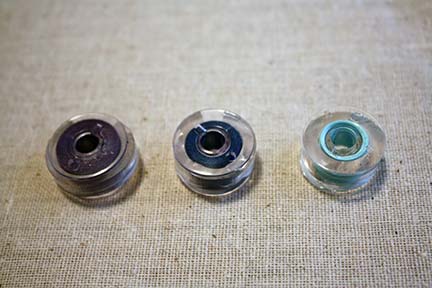
Wrap up your bobbins and slide the ring on top of your thread.
Place back in your storage container. That’s it! How easy and cheap was that? I’m thinking this would make an awesome little gift for the sewer in your life, quilt group, sewing swap, etc.
I love that they are useful no matter how full or empty your bobbin is. You don’t need a different size of tubing, it works for all your bobbins!
Happy Crafting,
Erin

You are so clever. I have been sewing for many years and I have tried every product that has come along to keep those darn threads under control. I am going to make a batch of these clips up for me and all of my friends. Thanks for sharing
this is great i have been looking for something like this! Great idea!!!!
You Rock! I now know what I will do with that bit of extra I bought at the hardware store.
Fantastic idea!
Thank you for sharing!!
Genene
What an awesome idea! I knew if I went looking I would find an alternative. Crafters always come up with ways around spending a lot of money. :)
INGENIOUS Thanks for sharing.
Val,
Clever!!!
Thank you for sharing.
What a wonderful idea to get my bobbins all neat for an easy and inexpensive way Thanks
love it, so simple thankyou for sharing.
brilliant, thank you
Great idea, thank you. My son is a plumber I am going to raid his plumbing supplies!
Thank you so much! This is so fantastic. Bought the tubing today.. 2 meters for 2 SGD.. almost nothing.. and it works!
How smart and practical, you are! Thank you for your idea ,all I have to do now is convert in metric system unless plumbing tubing comes ine inches like computer an TV screen!
Totally love this idea. Goodness knows I can spend a small fortune on sewing supplies. Love this tip-THANK YOU
wondering if the tubing has to be taken off before using in the machine.
How would the thread come off if you didn’t take it off ??? ;)
It is a genetic trait with bobbins – they loosen themselves up and get all tangled. Kind of like drycleaner hangers making more when you aren’t looking and getting a big tangle. Trust me they do this and if you have any kind of animal they are going to want to chew on it and swallow it – VERY bad idea for animal insides. Usually requires surgery ….. ask me how I know.
Of course they come off before using. They are just to keep them neat in the case.
In answer to Terri’s question.
Super idea! Will implement this for my bobbins.
That is brilliant. I never thought these tubings can be used in a different way like keeping those bobbins organized. It’s really clever and i can see that they are already organized. They actually look better now. Thanks for this idea. This is really new to me and this is going to be really useful.
What a fabulous idea. Thank you so much for sharing.
Brilliant! Thanks for sharing!!
Great idea for bobbin covers will get the tubing tomorrow. Thanks !
You are awesome. Thank you for sharing that idea it will make my bobbins look pretty again. I never would have thought of that idea.
Thanks, Vera
I am new to sewing and just now came across your blog. What a wonderfully clever idea! Bobbins drive me crazy with all the loose thread and oh the tangled mess. Will definately be getting tubing tomorrow. Thank you so much for sharing such a great idea. Ummm, any ideas on a bobbin box for storage? Mine are scattered and tangled in a drawer. I can’t seem to make myself spend so much money on a plastic box made for bobbins. Any ideas my email is: okiemaw9@aol.com.
Try using an ice cube tray. The ones used for making the “tubes” of ice that slip into a water bottle work perfectly. I picked one up for less than $2. Haven’t found them in my local $ store, but worth a look :)
My sewing teacher kept her thread and matching bobbin in snack size zip top bags. Then you can keep the bags by color family in a larger bag. I am kinda weird about using the same thread top and bottom whenever possible, so this works great for me.
A couple of nights ago I spent 30 minutes straightening out all my bobbins…looked just like your picture! You are brilliant!!! Going by Lowed asap!
That’s brilliant! I’m heading to the hardware store!
My bobbins were everywhere, so I stuck them on a 1/8″ wooden dowel with rubber band on each end. U could probably use chopstick or skewer or a straw. I hate buying anything, but tomorrow I will buy some tubing to get their loose ends inder control!
Love your idea. You should see my bobbins (all hidden under a mess of thread. I was thinking of getting some wooden dowels that could stand up in a foam sheet in a box. I would have them the height of the largest spool of thread plus room for the matching bobbin to slip on top with a little extra space . I would keep the dowels the same height for all the spools of thread. I haven’t tried it yet, but intend to do so. Do you think this would work? Dee Bright (belleek@aol.com)
Yes, it would work. My husband did this for me making a rack for the wall for all my embroidery threads. Love it!
Thankyou. Bobbin thread drives me bonkers. Now for some sanity. Pinning on my board for all to see x
Brilliant! My bobbin case is just like that and it drives me nuts…I am making this today :-)
Thank you! You surely made my day!
Erin…you should work for NASA! I am a Tatter and since we use bobbins for our shuttles…this really caught my eye! We have the same problem…thank you so much!!! I will share this with my Tatting Buddies. Thank you! ~..~
You are brilliant!!!! Thank you so much for sharing!!!
It’s a very good idea. thank you.
What a great idea. I went and googled bobbin covers and came across this link. I’m off to the hardware store today ! These unraveling bobbins has been an ongoing nuisance forever in my bobbin case.. Not any more…Yeaaaaaa!
I made these and they work fantastic! As stated it does not matter how much thread is on the bobbin it holds. Also my son let me use his cutter that he purchased to do the plastic water line replacement in his older home. It worked fantastic, much easier than the exacto knife.
wonderful idea!!!!!!!!!!!!!!
Thank you for this idea! Plan to share it with my sewing friends!!
Thanks so much for your great idea that I will share with my boss at work. The loose threads in our busy store drive me nuts. This is a great great solution. Can’t wait to buy the tubing.
Superb idea and look very neat. cant wait to try this with my messy collection of bobbin hehe.
I have to agree, $10 is just crazy. Thank you for posting this great and easy fix for an annoying problem.
Brilliant!
I had never heard of these clips untill visiting my sister-in-law but she said that she could not find any more. Thank you for thinking outside of the box and shareing. Fantastic.
Erin, what a great idea, you should submit it to Fons and Porter and get a one-year subscription for free (if you haven’t already). Thanks, and plan to go to Home Depot ASAP.
Whoa! Ingenious! Mine are the before picture. Off we go to Home Depot. Love this idea!!!! Thx.
Erin: This tutorial was a BIG help! Thanks. Agree that the ‘buddies’ or ‘pink things’, etc’ are too expensive and really not helpful. Pony tails are cute but still hide thread color. Haven’t used the toe-divider-foam thing but THIS IS THE BEST! You see the color and can just twist easily around bobbin to catch any errant thread!
I’d like to add that sometimes the tubing from hardware store is distorted, (not round, or is kinked,) from being on a big roll. If you cut rings from something oval it doesn’t fit well on round bobbins.
My husband, (the can-do-all-guy,) suggested this: Cut your “not round” tubing into 3″ lengths. Dump into boiling water. Within a couple of minutes the tubing returns to it’s original “extruded” round size! (Be careful as the water needs to be boiling… bubbles breaking. Use mitts and tweezers to pull from the water.)
Place your now “re-rounded’ tubing on paper towel and let come to room temperature, or if in a hurry, can put in refrigerator for a few minutes before cutting.
After tubing re-rounded I followed your directions except my old hands couldn’t handle the exacto knife well. I found a ‘poly-tube-cutter-scissor-like blade unit at chain hardware store, (about $12, but worth it as I want extra rings and want to make some for sewing friends. This tool is awesome, fast and could cut the 1/4” rings well. (Sharp scissors worked to make the split… )
However you cut tubing to a ring: if your ring wasn’t very even, you could open it up at the split and trim some of the excess away. Also I found 5/8 inner diameter, 3/4 outer to be good for really full bobbins. (Wall is thinner, but seems to work.)
AGAIN, an awesome, informative tutorial and I thank you v. much. Love this site!
Hello from a land down under,
Super cool idea. Thanks for sharing!!!!
this is brilliant! I just love this idea! must, must do! my bobbins are a mess!
Thank you for this nice idea! I am on oxygen and have been trying to think of something to do with my hoses when they need replacing? I am going to for sure try this out.
I put a child’s pony tail holder around each of my bobbins.
Super cool idea! Headed to Home Depot first thing tomorrow!
Awesome idea.Thanks for sharing
Why didn’t I think of this?
I’ve been racking my brains for a solution to all those tangled threads in my sewing box. You are right, it doesn’t matter how often you tidy them, the next time you look, they’re all tangled again.
Thanks for a brilliant idea from a lady who obviously thinks outside the box.
Richard
Good idea, I’ll use it soon as possible! Thanks