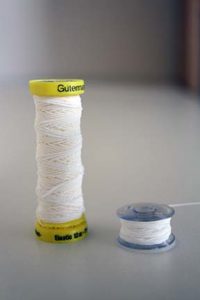
Shirring (pronounced “sure-ing”, not “shear-ing”) is a great technique to easily add a comfy, elasticized waistband to a project. You’ll be surprised just how easy it is! The only thing you’ll need, besides basic sewing supplies, that you may not have on hand is some elastic thread:
You’ll want 2-3 spools. Sewing all the little bands uses up a bit of the elasticized thread!
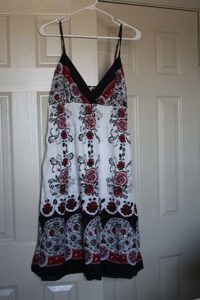
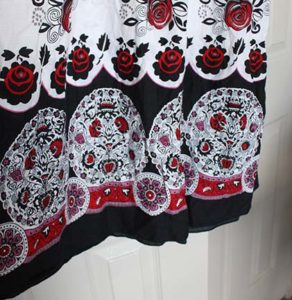
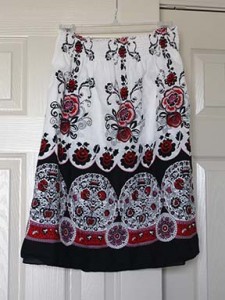
I’ve got a dress I picked up at goodwill for $2 that I’m going to make into a skirt. I LOVED the colors and the border print on this dress,
just not the top with teeny tiny triangles and the spaghetti straps. (It’s hard to find good border prints so I’m always on the lookout for border prints on premade items that I can use for other purposes!)
I decided that if I just cut off the triangle tops and hemmed the dress above the pre-existing shirring it would be a little long for my tastes. I like my skirts to either hit right at my knee, or really long, maxi type ones.
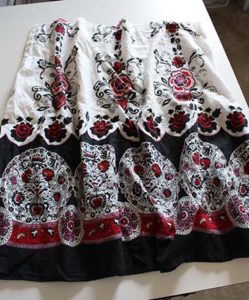
So I made a cut just below the shirring. (I’ll save the triangles for later. I could make some fun pockets on a solid skirt or something…)
After cutting, I ran the top edge through my serger to finish off the edge. If you don’t have a serger a small 1/4″ hem, rolled hem, or overcast stitch on your regular sewing machine will do just fine. Choose the method you are most comfortable with.
Now we’re ready to get to the shirring! First step is to use your elastic thread to wind up the bobbin. We’ll be sewing with regular thread on the top of your machine, but switching to elastic thread in the bottom. Please hand wind the bobbin. We want to wrap it securely, but try not to stretch the bobbin thread too much. (While you are at it, and if you have another empty bobbin, go ahead and wrap at least two. This will take a few bobbins! I used 1 1/2 spools of elastic thread and 3 bobbins for mine.)
Now, thread your machine as normal, just replace your elastic bobbin for your regular bobbin. We’ll need to change a few stitch settings on your machine as well. First, set your stitch length to 3-3.5 and your tension to around a 6. (This is for my Janome machine. You may need to change yours slightly.) Why the changes? We changed the stitch length because if it’s too small, there’s no room for the fabric to gather. We turned the tension up higher than normal so that the machine stretches the elastic a bit as it sews. (This is what causes much of the puckering and shirring as we go.)
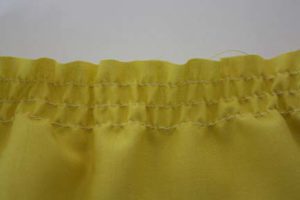
We’ll do a couple of test rows on a scrap first to make sure we have the appropriate settings. Try to make adjustments as necessary so the stitching looks similar to mine below:
Things look good!
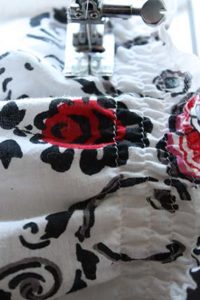
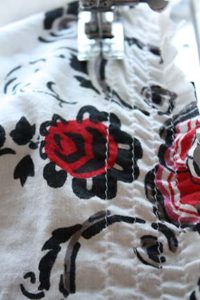
Don’t worry if it doesn’t look like your finished shirr yet! It will become more gathered as you sew, and there’s one step left after we’re done stitching the rows. I do about 8-10 rows. It’s up to you. Any less and the waist can end up rolling, which isn’t fun! Keep the rows approximately 1/4″ apart. Start at the edge of the waistband and work your way in.
I just use the edge of my presser foot as a guideline (even though it’s a little over 1/4″).
As you start to get more rows, you’ll need to stretch the waistband out slightly as you sew. We’d rather not have any puckers in the stitching!
After you’ve sewn your rows up heat up your iron as hot as your material can handle and turn your steam on. Don’t press the iron down on top of your shirring, but hold it slightly above your shirring rows with the steam on full blast. You’ll see it start to shrink even more! Go around your entire waistband and you’re finished!
Easy? Right?
Tip on shrinkage amounts: Unfortunately it’s not an exact science. I started out with a piece that would have had a 44″ waist, had I left it. After 8 rows of shirring it shrunk to 31″. After steaming the shirring it shrunk to 27″ (Now, I don’t have a 27″ waist, but the elastic thread is VERY stretchy and the bands of shirring will stretch out a handful of inches to what my waist size is.)
Happy Sewing,
Erin
P.S. Did you see my new sewing pattern release last week? It’s also on sale for $5 over at the YCMT $5 Summer Sale along with some other fun patterns!
P.P.S. Have you liked Schlosser Designs yet on Facebook? I hit 600 likes over the weekend and am doing a little giveaway over there!

Super cute! Thanks for the tutorial. It might actually give me the guts to do this some day. :-)
Brilliant, thanks a bunch for the tutorial.
What is the problem if the garment doesn’t stretch when shirring complete